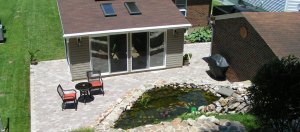
Finished Patio constructed with pavers.
Walkways and patios can easily be construct by the do it yourself homeowner with concrete pavers. It will take some planning and a lot of sweat to accomplish, but the money you will save will be well worth it. On average, the labor cost of hiring someone to do the job will be at least as much as the cost of the materials, if not more. Contractors often add a mark up charge of around 2% to 5%, or more, on the materials, a cost that is passed on to you. It is a standard practice in the industry and one that you should plan for if you are considering a contractor.
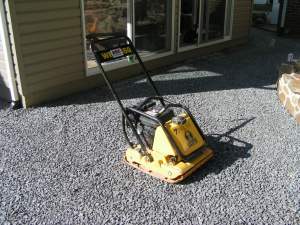
Plate Compactor
Why use concrete pavers instead of just poring a concrete slab? Well, for one thing, one person can accomplish this without the help of anyone else (assuming that you are in good health for this type of labor). Of course a little help can go a long way to getting the job done faster, but it’s not necessary. Another reason is that concrete, no matter how well prepared, pored, and worked, will eventually crack, chip, and even flake. Removal of damaged concrete is a chore that will require much more work and expensive equipment to remove and replace. Repairs to concrete are often ugly, mismatched, and hard to accomplish, and are temporary at best. The use of manufactured concrete pavers is uniform, and gives the appearance of cobblestone, or even flagstone, without the drawbacks of a potentially bad pored concrete job. Another problem with concrete slabs is that they often develop ugly stains that are difficult or even impossible to remove. Concrete slabs are also prone to upheaval if the ground below it freezes, causing uneven settling when the ground thaws. This is the primary reason for cracks, which develop because the slab is no longer fully supported. Pavers on the other hand, will heave and resettle. If, over time, the pavers become uneven, they can easily be removed and reinstalled in their original position.
Construction is really straight forward, and as long as you stick to these steps you will have a wonderful walkway or patio that will last for many years, and is easily repaired if required. You can use any of the manufactured concrete products that are readily available at your local home improvement center, but stick to these basics for a trouble free installation. For simplicity, we will be using 6 inch by 9 inch concrete pavers for this patio project. You will use the same method of construction if you are constructing a walkway.
Step 1: Lay out the area carefully for the patio. Pay close attention to the dimensions and ensure that the borders are square to any structures that the patio will be placed against.
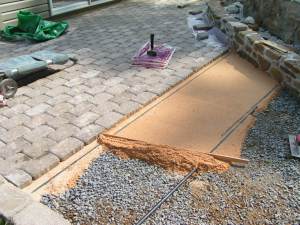
Leveling the sand for the pavers
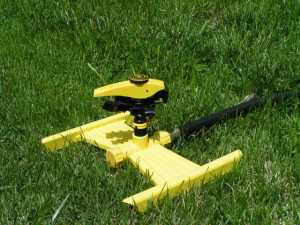
Step 2: Level the area for the patio, keep in mind that you will need a slope of 1 inch drop for every 4 feet of patio to ensure drainage, and that the patio should drain away from the foundation of any existing structures (such as the homes foundation). Remove any sod that is in the patio area, sod will not compact and will give under the weight of the patio causing an uneven surface. Also, make sure you leave room for the the thickness of the base material, leveling sand, and the thickness of the pavers you are installing. Use a 3 foot level and a straight 2×4 to get your grade right.
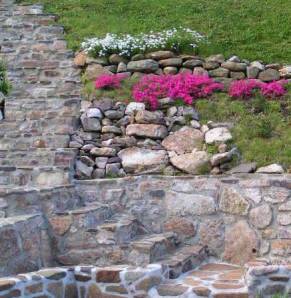
Step 3: If your patio has a low side, a retaining wall will be needed, calculate the added dimensions of the retaining wall into your overall size requirement. In this project I used preformed concrete wall blocks for the retaining wall. The retaining wall will have to be constructed before the patio construction can begin. Dig the foundation of the retaining wall, below the frost line in your area, and make sure to include any variations in the walls height, such as the drop needed for proper drainage as discussed in Step 2. Remember, level and accurate is what you must pay special attention to, if the foundation is not right, then neither will be the final result. You can use leveling sand to ensure that your retaining wall is level with the rest of the project. If your wall has more that one course, use wall adhesive when placing the top course to ensure that the wall blocks do not move. Next back fill the area behind the wall and level the area for the patio.
Note: You will need some sort of retainer for the edge of the patio, or walkway, that is not supported by a wall or home foundation. There are a number of ways to do this, one is to use a plastic retainer for pavers that has a flange that you drive spikes through to secure them in place. Another way to do it is to use wall blocks for the border, this is much more permanent and will add a little contrast to your design as well. Just install the wall block the same as you would a retaining wall as described in Step 3.
Step 4: Next you will need to rent a plate compactor to ensure that the soil underneath your patio is firm and will not sink causing your patio to sink with it. For small or narrow projects, such as a walkway, you can use a tamp, but if the project is wide enough, you should use a plate compactor in order to make sure that the soil is fully compacted and hard. Recheck you drainage slope and make any adjustments needed before you go to the next the step.
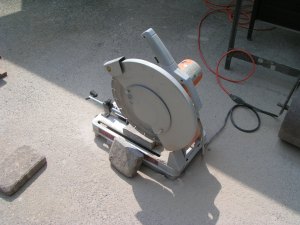
Cut Off Saw
Step 5: Spread and level your base material, in this instance I used Crusher Run, a fine gravel, for the base. I personally recommend it because it is extremely durable and will not shift later on, and it is inexpensive. Use the plate compactor to settle the base and the recheck your drainage slope, adjust as necessary and compact it again. Make sure that the slope is right, the next step will go much easier if you do.
Step 6: Use lengths of black iron pipe as a spacer and to give a straight surface to level your leveling sand. I use black iron pipe in varied lengths that is about 1 inch in diameter (pipe is measured by its inside diameter, so use 3/4 inch pipe which will give you about an inch, also iron pipe is very ridged and not susceptible to flexing) to ensure that the leveling sand is consistent. Spread the leveling sand onto the base material and use a 2×4, or other straight edge, to level the sand. If the sand is dry, be sure to wet it down with water so it is just moist, this will aid in the leveling and ensure that it stays where you put it. At least 2 pieces of pipe will be needed to keep the sand level. (see picture). After leveling the sand, pull up the pipe and fill in the spaces left by the pipe with a concrete trawl, smooth it out with the surrounding sand.
Step 7: Lay your pavers on top of the sand and keep the joints, spaces between the pavers, tight. You can use any pattern you like, from simple staggered to complex designs. Place the pavers carefully so that they are level on the sand.
Step 8: Cut your pavers at the end of each run to fit the space as needed, you will need a cut off saw with a diamond blade, which is more durable than composite blades, and should last you the entire project. You can rent a cut off saw for about $35 a day or so, but the tool rental store may require you to buy the blade. Some blades can be expensive, I have gotten good duty from Harbor Freight blades, their about $50 for the 14 inch blades. If your project is large and will take you a few days to complete, you might consider buying your own cut off saw instead of renting, it might be cheaper in the long run.
Step 9: Sweep sand over the the laid pavers to lock them in place. QuickCrete has a product that is called Power Lock, which locks and seals the joints if you prefer not to use sand. This is a mortar type product and works very well, just follow the instructions on the bag. Sweep up the excess and your done.
If your project is a large one and you can’t finish laying your pavers in one day, be sure to lay plastic sheeting or a tarp over the areas that are unfinished. This will keep the sand moist and prevent it from moving if it rains.
Enjoy your new patio or walkway, have fun with your home improvement project.
Filed under: Outdoors | Tagged: concrete paver, how to build a patio, patio, pavers, walkways | Leave a comment »